How to create a Kubernetes Cluster using Ubuntu

In the last two weeks, I've been trying to create a Kubernetes cluster in my homelab and I got so frustrated after few attempts to make it run smooth and with no issues during the creating of the control plane and the worker nodes using Ubuntu 24.04 for the operating system.
Sometimes the master node would start correctly, but other times I couldn't add the worker machines to the cluster. After restarting the servers, the cluster wouldn't work as I expected.
So, I decided to start a more in-depth research to understand how to prepare the environment for running a Kubernetes cluster in my homelab based on Proxmox
To illustrate the installation process, I've configured a modest, three-node Kubernetes cluster. It's built around one central Control Plane node and two dedicated Worker nodes—a common small-scale environment that can be scaled up later (Kubernetes is capable of handling clusters up to 5000 nodes).
First of all, we need to meet those minimum requirements.
- The environment comprises three Ubuntu virtual machines. One component will assume the orchestrator role, with the remaining units operating as compute agents. This guide leverages two processing units.
- Secure shell (SSH) connectivity to every machine, provisioned with elevated user privileges.
- The essential hardware specification for each virtual machine is 2GB of random access memory (RAM) and a pair of virtual central processing units (vCPUs).
- A base requirement of 50GB of available storage capacity is necessary.
Since I use an Ubuntu Cloud-Init image to clone new virtual machines, I set up my SSH keys to ensure seamless access. By doing this, I eliminate the need for credentials when connecting to each new host. We will soon publish an easy tutorial here on the website detailing the process of creating a template with Cloud-Init for Ubuntu.
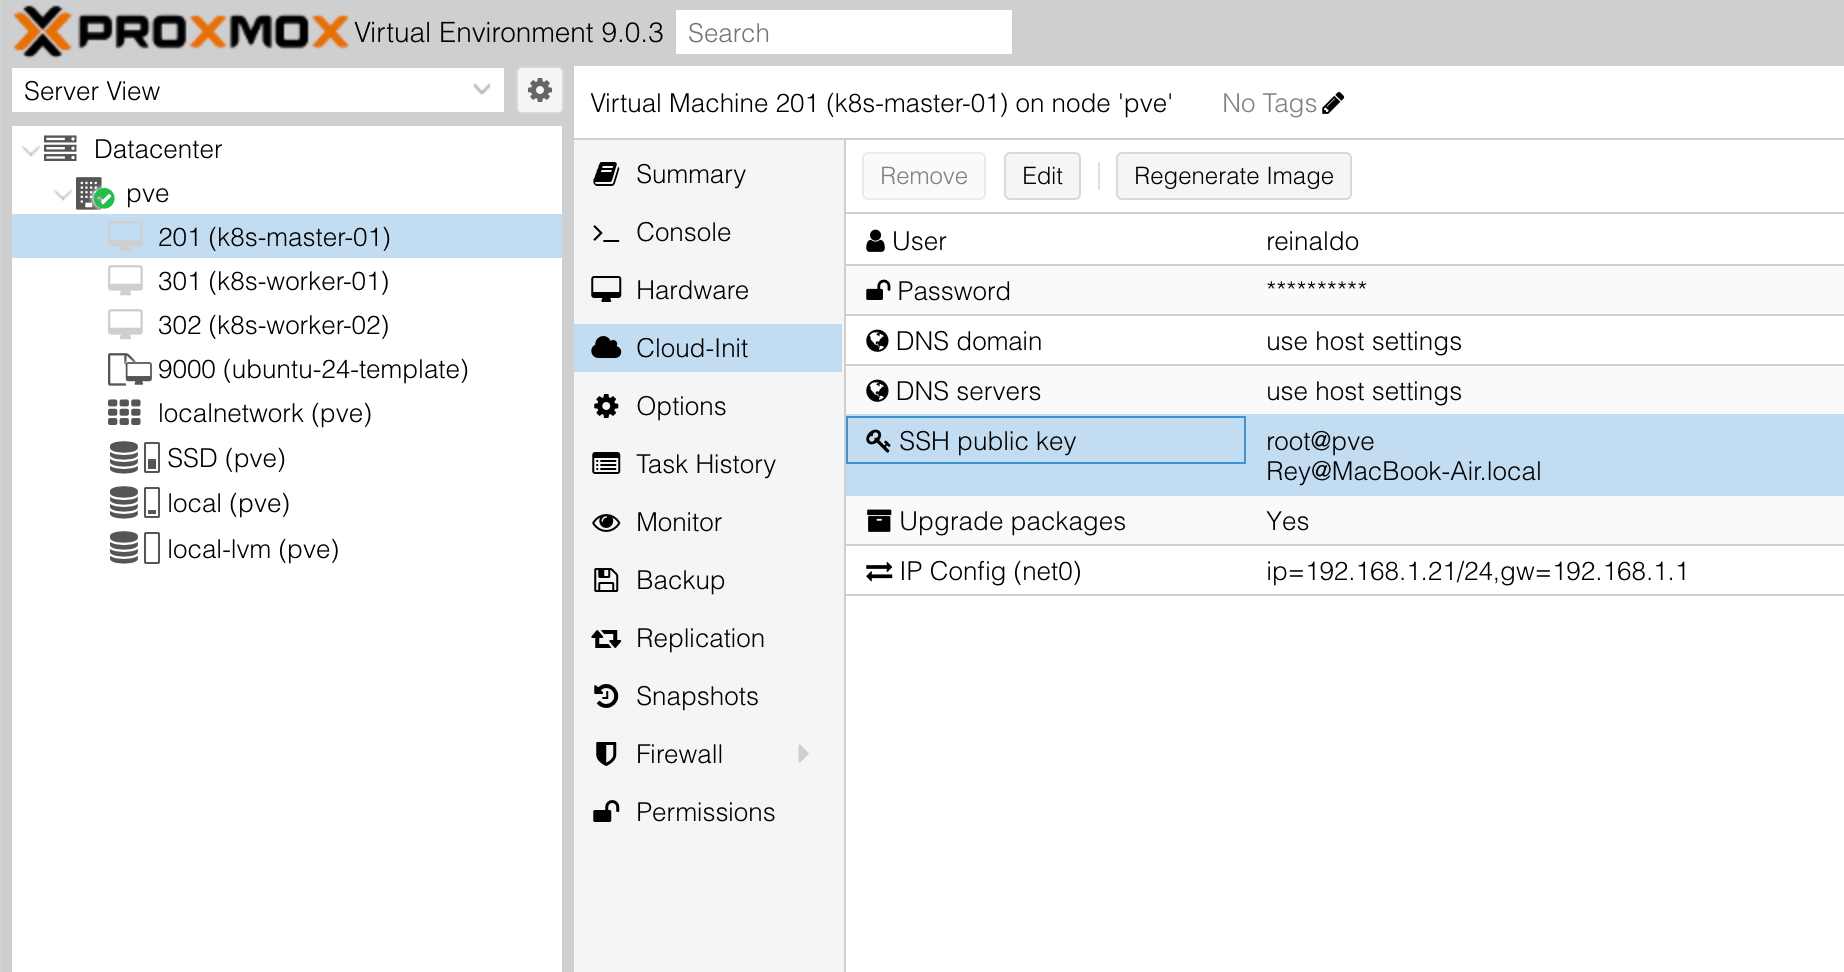
For this setup I've prepared three servers with static IP Address like:
| Nome Host (Hostname) | IP Address |
|---|---|
| k8s-master-01 | 192.168.1.21 |
| k8s-worker-01 | 192.168.1.31 |
| k8s-worker-02 | 192.168.1.32 |
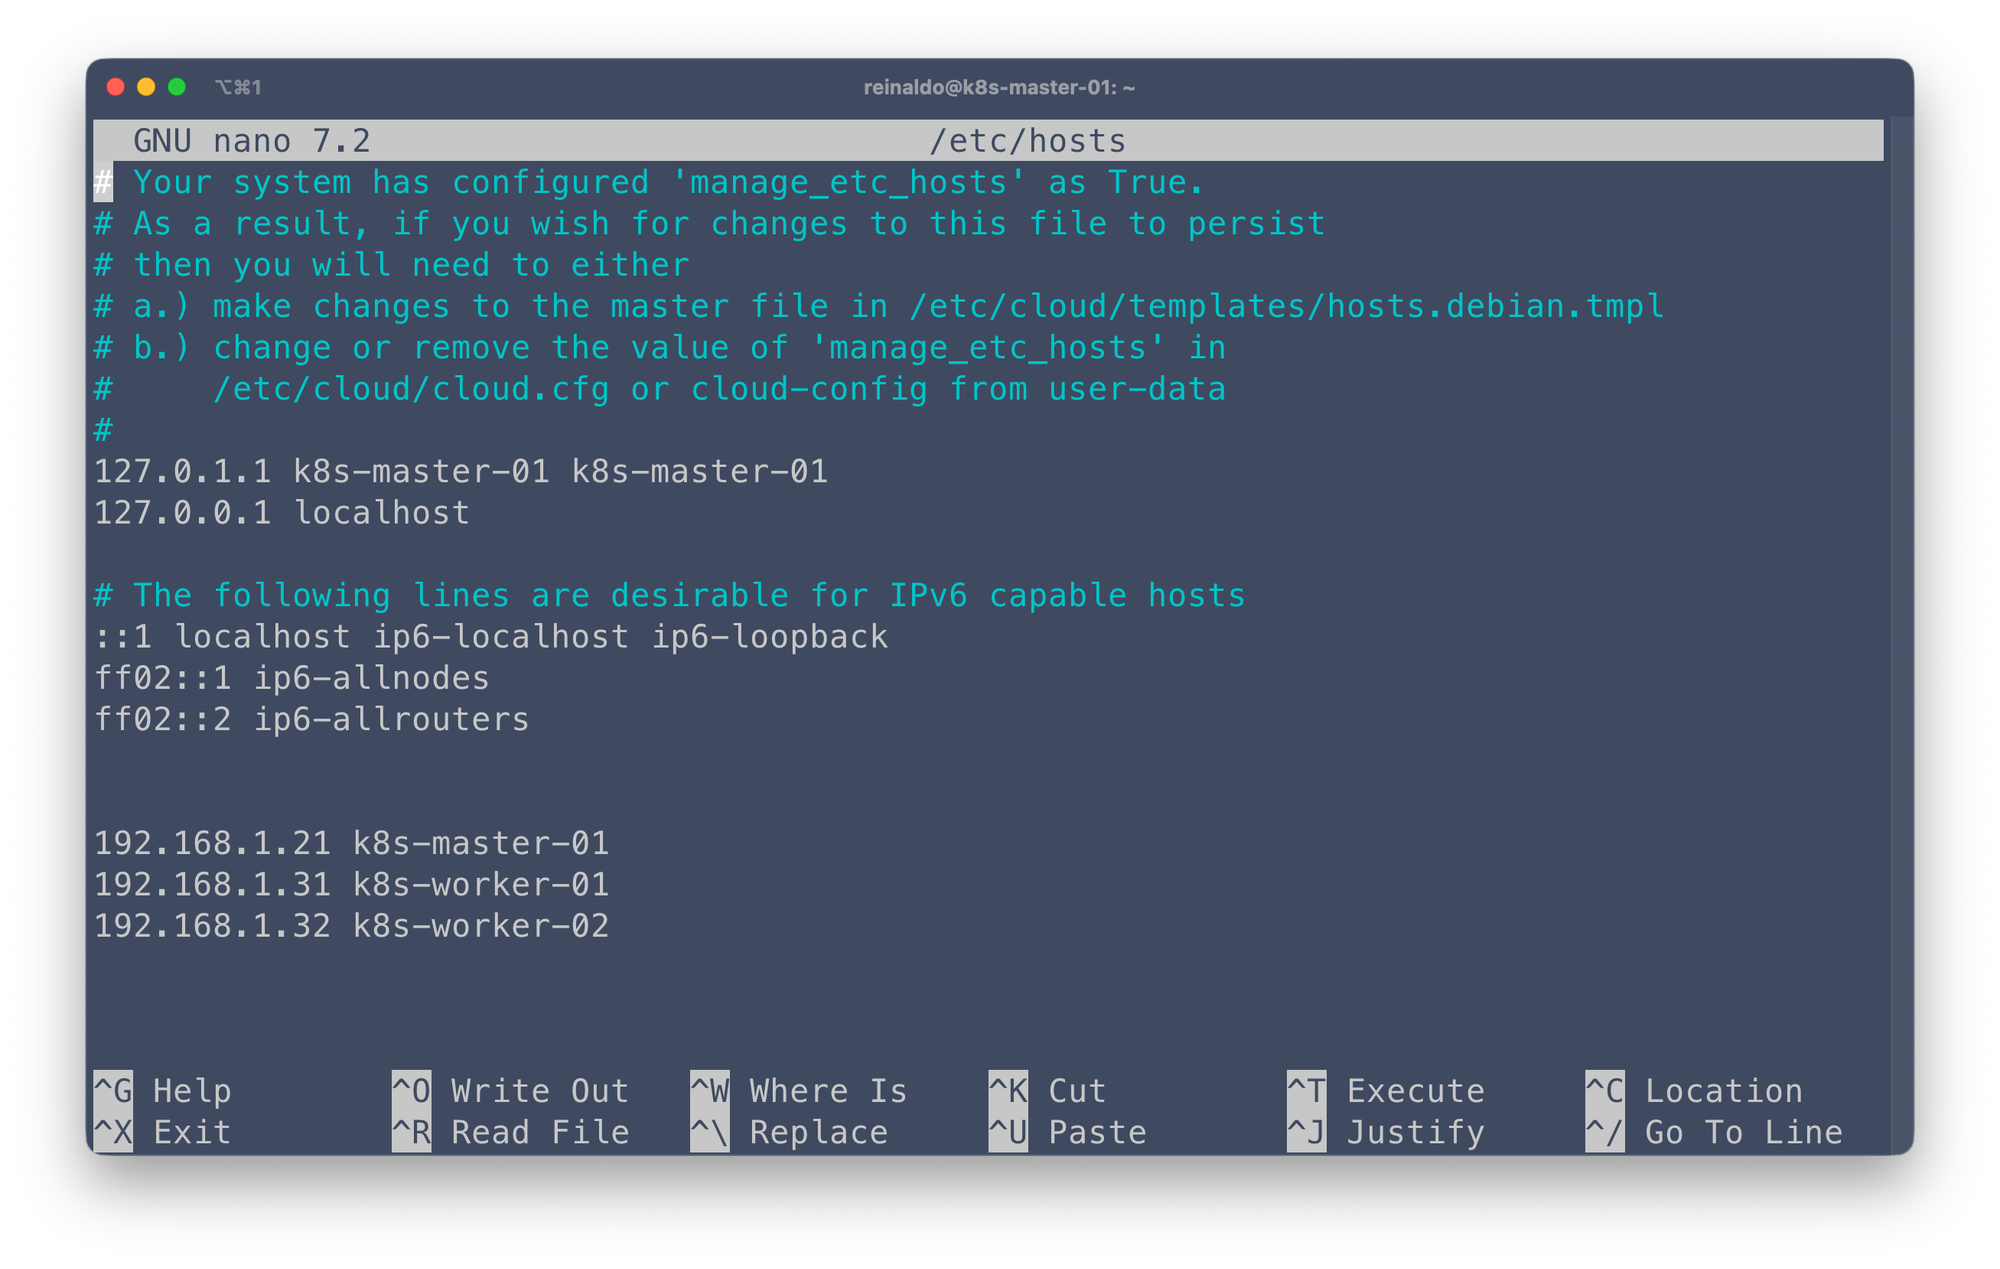
Since you don't have a DNS server, using static IP addresses combined with manually updating the /etc/hosts file on each VM is the best way to ensure all your machines can communicate with each other using easily memorable hostnames.
This approach has two key steps, which you've executed perfectly:
- Static IP Configuration: Assigning a fixed, non-DHCP IP address to each Virtual Machine (VM). This guarantees the IP never changes.
- Local Name Resolution (The
hostsFile): Modifying the/etc/hostsfile (on Linux/Ubuntu) on every VM to map the IP addresses to their corresponding hostnames.
sudo nano /etc/hosts
Swap configuration
The default behavior of a kubelet is to fail to start if swap memory is detected on a node. This means that swap should either be disabled or tolerated by kubelet.
From: https://kubernetes.io/docs/setup/production-environment/tools/kubeadm/install-kubeadm/
To disable swap on the nodes just un the command on all nodes:
sudo swapoff -a
Configure IPv4 networking for all nodes
The main goal is to make sure your Pods (the smallest units in Kubernetes) can talk to each other and to the outside world without any trouble.
- Pods Must Talk: In Kubernetes, every Pod gets its own unique IP address. For services to work correctly, a Pod on one server must be able to communicate with a Pod on another server.
- Kernel Settings: Kubernetes tools like the Container Network Interface (CNI) and the
kube-proxyrely on specific settings inside the Linux kernel. If these settings aren't right, traffic won't be routed or managed correctly.
Create a Kubernetes configuration file in the /etc/sysctl.d/ directory
sudo nano /etc/sysctl.d/k8s.conf
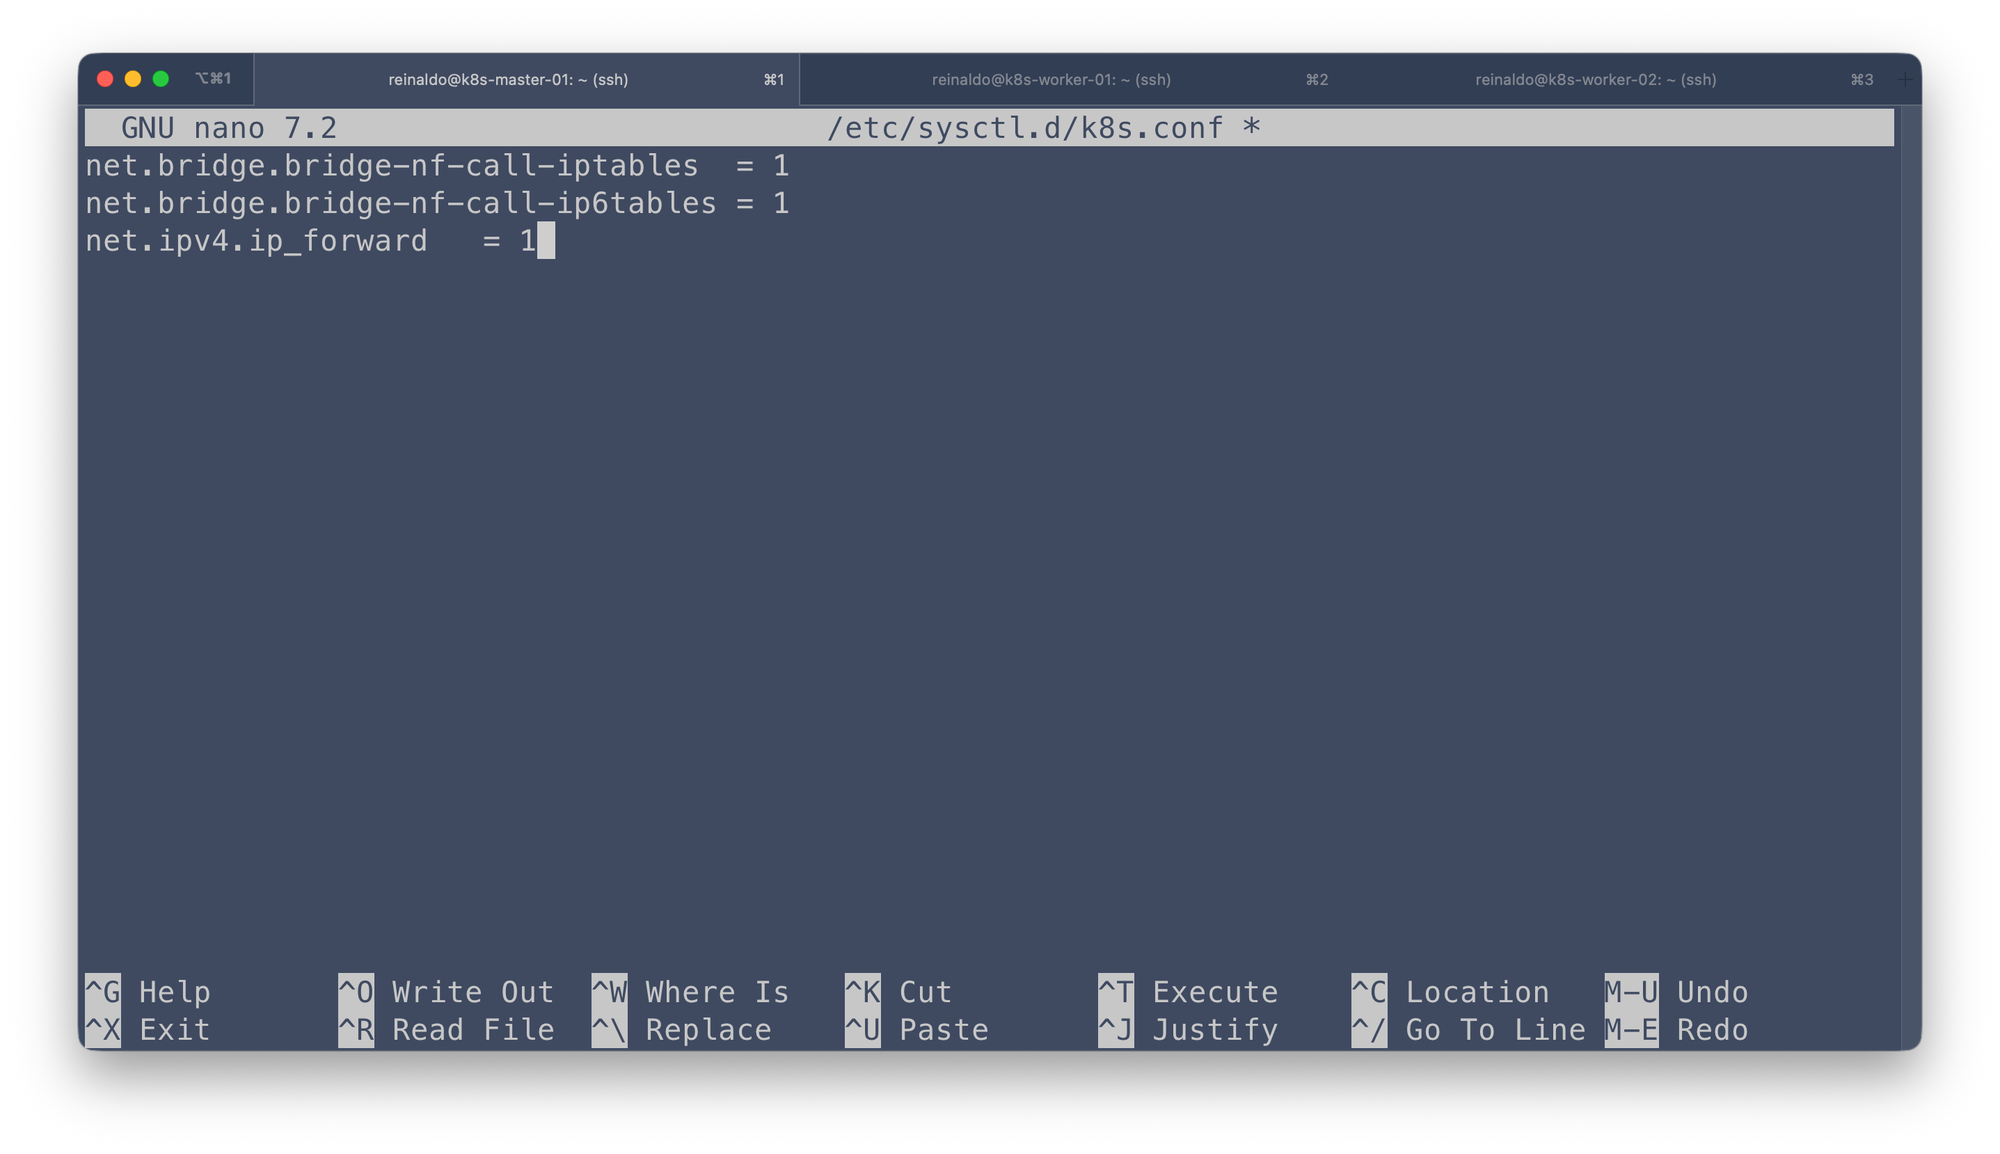
Save the configuration file and make sure that you apply the new settings by running the command:
sudo sysctl --systemContainerd
Kubernetes 1.34 requires that you use a runtime that conforms with the Container Runtime Interface (CRI).
Because Containerd is the standard container runtime for Kubernetes, you must load the overlay and br_netfilter kernel modules for its seamless operation. Use the following commands to enable and load them:
sudo modprobe overlaysudo modprobe br_netfilterTo make sure that modules are loaded automaticlyu after reboot the VM create a configuration file that load them:
sudo nano /etc/modules-load.d/k8s.confJust add the two lines in this new configuration file and save it
overlay
br_netfilter
/etc/modules-load.d/k8s.conf
Docker installation
Docker and Kubernetes work together to manage large-scale microservice applications. Docker creates and manages containers on the nodes, while Kubernetes orchestrates their deployment, scaling, and monitoring across the cluster.
From the Official documentation for Docker Engine installation on Ubuntu is recommend that you remove any previsous packages installed for containerd and runc.
Moreover, Docker Engine depends oncontainerdandrunc. Docker Engine bundles these dependencies as one bundle:containerd.io. If you have installed thecontainerdorruncpreviously, uninstall them to avoid conflicts with the versions bundled with Docker Engine.
Run the following command to uninstall all conflicting packages:
for pkg in docker.io docker-doc docker-compose docker-compose-v2 podman-docker containerd runc; do sudo apt-get remove $pkg; doneYou can install Docker on all nodes from Ubuntu's default repositories using these commands:
# Add Docker's official GPG key:
sudo apt-get update
sudo apt-get install ca-certificates curl
sudo install -m 0755 -d /etc/apt/keyrings
sudo curl -fsSL https://download.docker.com/linux/ubuntu/gpg -o /etc/apt/keyrings/docker.asc
sudo chmod a+r /etc/apt/keyrings/docker.asc

# Add the repository to Apt sources:
echo \
  "deb [arch=$(dpkg --print-architecture) signed-by=/etc/apt/keyrings/docker.asc] https://download.docker.com/linux/ubuntu \
  $(. /etc/os-release && echo "${UBUNTU_CODENAME:-$VERSION_CODENAME}") stable" | \
  sudo tee /etc/apt/sources.list.d/docker.list > /dev/null
sudo apt-get update
Install the last version of Docker
sudo apt-get install docker-ce docker-ce-cli containerd.io docker-buildx-plugin docker-compose-pluginFollowing Docker documentation about the installation we need to grant rights to non-root users in Ubuntu, you can have details about this here. So we need to create the docker group and grant permissions to your account
sudo groupadd docker
sudo usermod -aG docker $USER
Add your $USER to docker group in all nodes
Check if Docker is correctly installed and running on all nodes
sudo systemctl status docker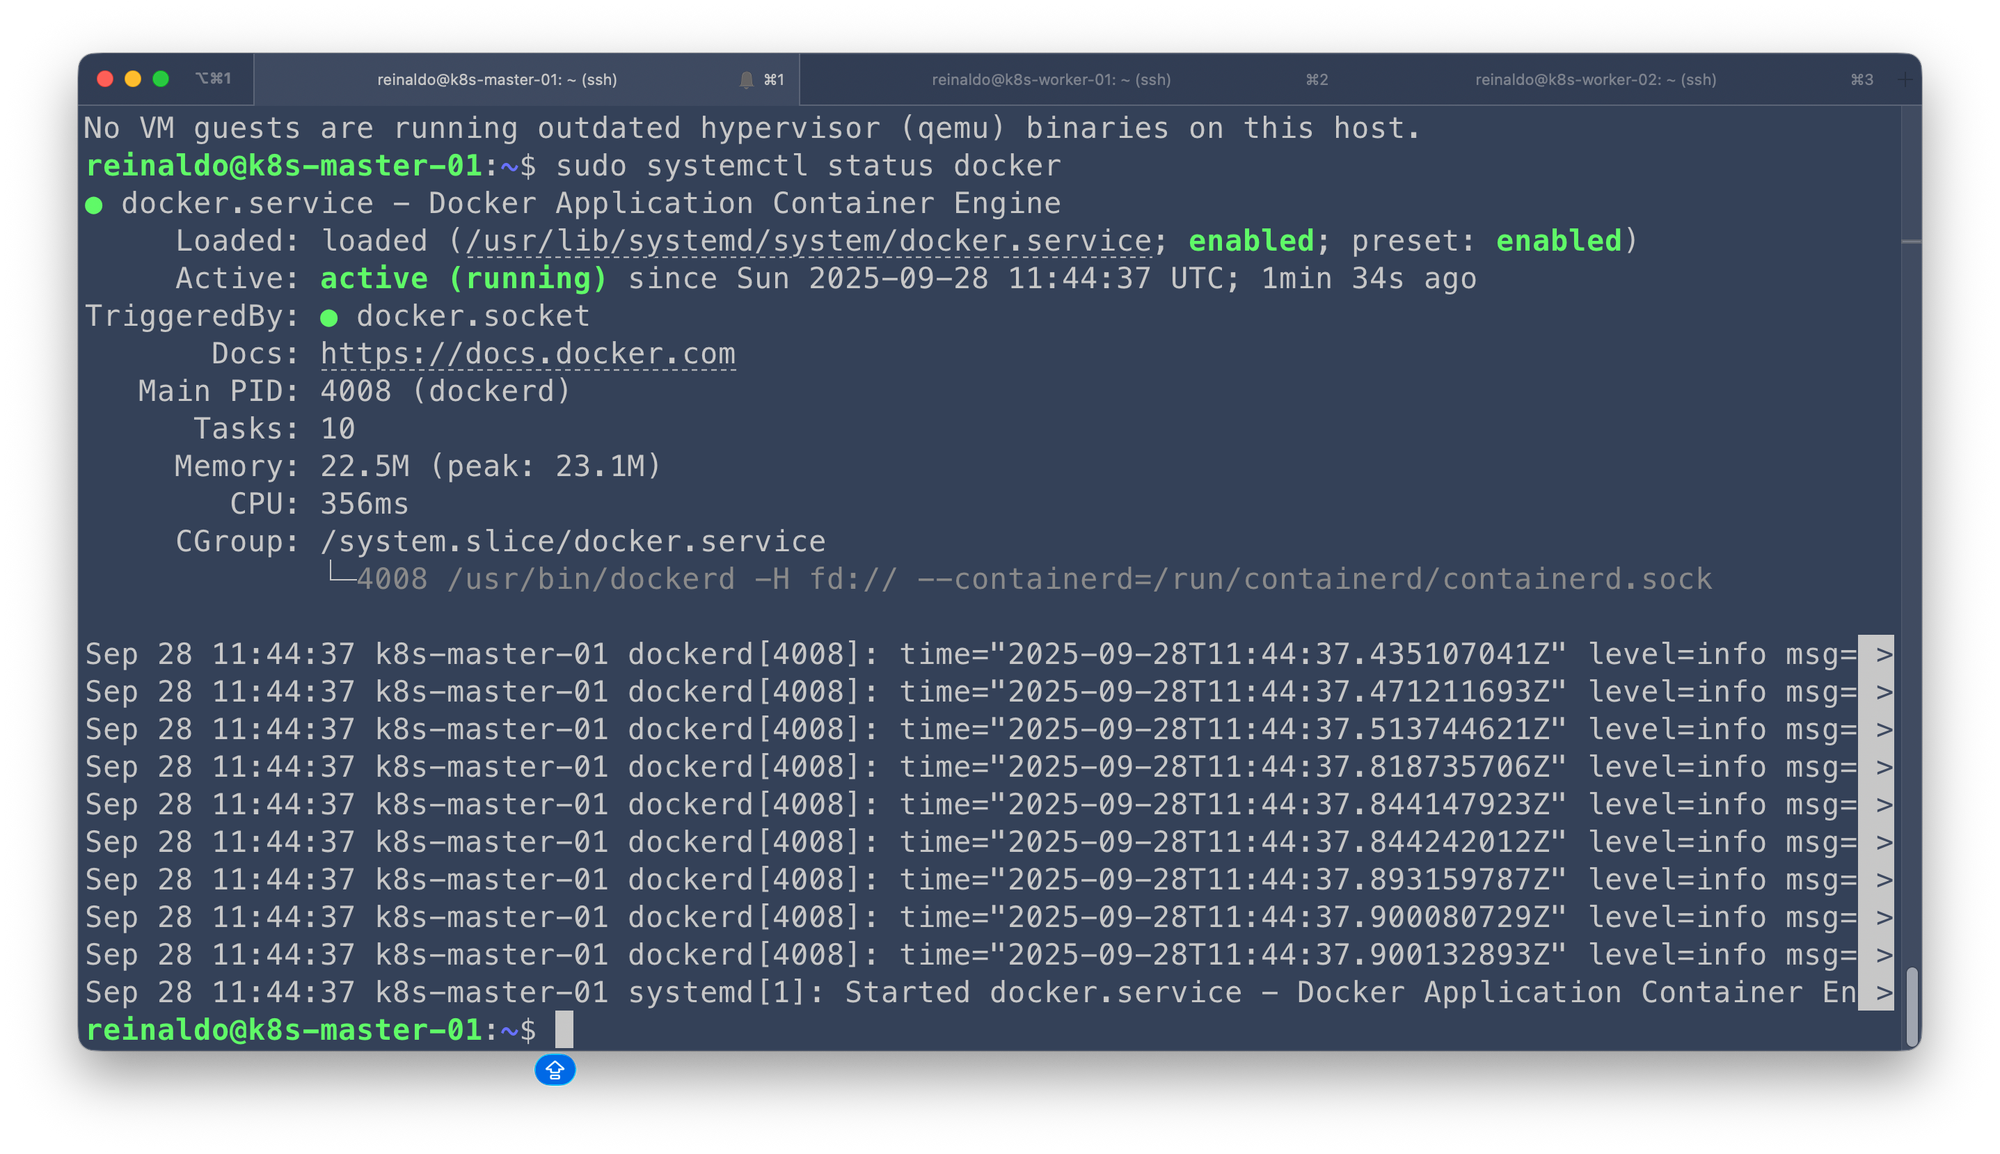
It's important be sure to enable the Docker daemon to autostart on system startup
sudo systemctl enable dockerInstalling Kubernetes componentes on all nodes
Update the apt package index and install packages needed to use the Kubernetes apt repository:
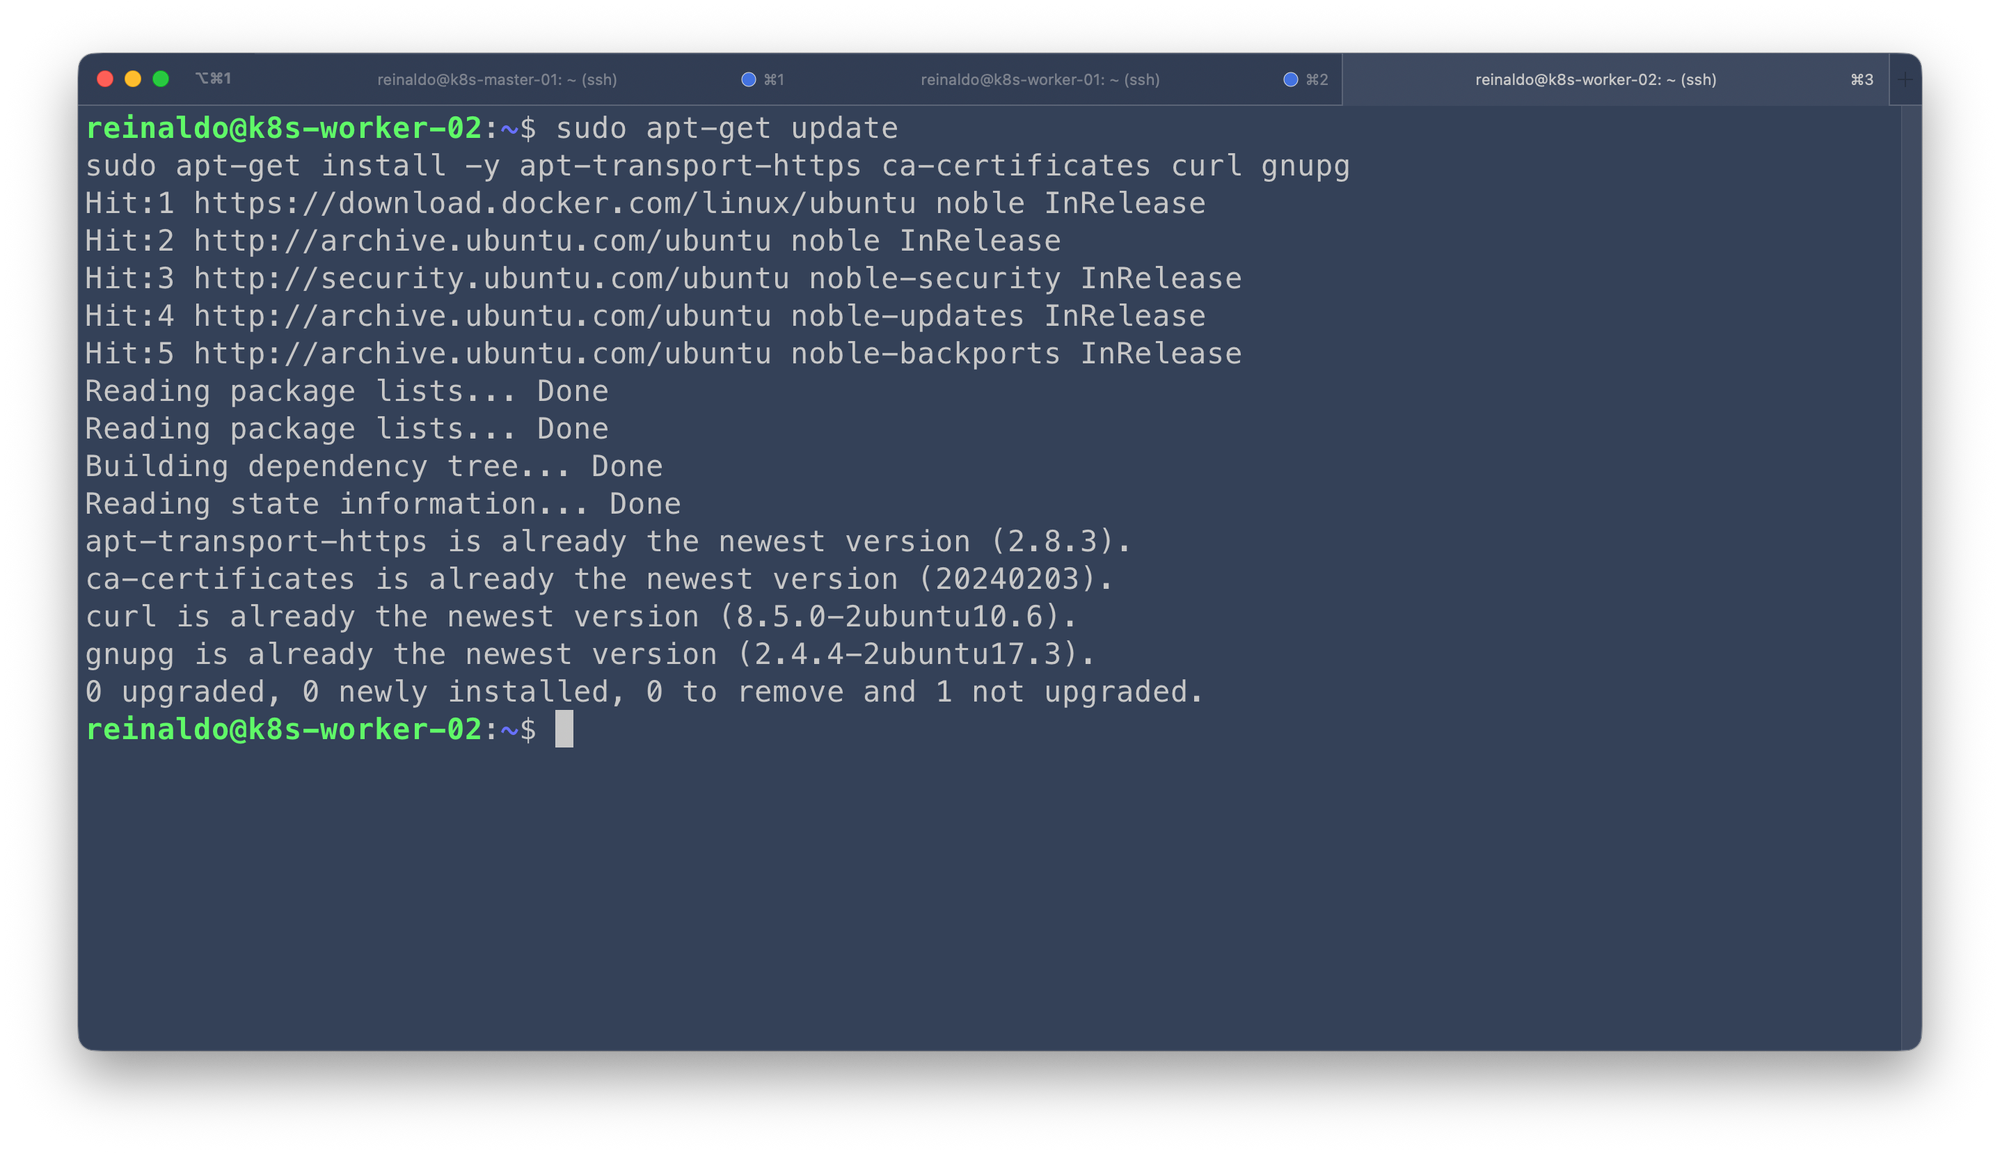
sudo apt-get update
sudo apt-get install -y apt-transport-https ca-certificates curl gnupg
Download the public signing key for the Kubernetes package repositories. The same signing key is used for all repositories so you can disregard the version in the URL:
curl -fsSL https://pkgs.k8s.io/core:/stable:/v1.34/deb/Release.key | sudo gpg --dearmor -o /etc/apt/keyrings/kubernetes-apt-keyring.gpg

sudo chmod 644 /etc/apt/keyrings/kubernetes-apt-keyring.gpg
Add the Kubernetes GPG signing key.
Add the appropriate Kubernetes apt repository. If you want to use Kubernetes version different than v1.34, replace v1.34 with the desired minor version in the command below:
echo 'deb [signed-by=/etc/apt/keyrings/kubernetes-apt-keyring.gpg] https://pkgs.k8s.io/core:/stable:/v1.34/deb/ /' | sudo tee /etc/apt/sources.list.d/kubernetes.list
sudo chmod 644 /etc/apt/sources.list.d/kubernetes.list
Update apt package index, then install kubelet, kubeadm and kubectl
kubeadm: Your go-to utility for bootstrapping a Kubernetes cluster. It handles the initial heavy lifting, simplifying setup by automating cluster creation, handling complex configurations, and making it easy to integrate remote nodes, set up the control plane, and define networking.kubelet: The worker component residing on every machine. Its key role is to receive instructions from the main cluster control plane and execute them, ensuring that the containers assigned to its node are running, healthy, and adhere to the cluster's specifications.kubectl: The user-facing tool for managing your entire Kubernetes environment. This CLI utility is used to control, monitor, and deploy resources (like nodes and pods) within the cluster, letting you check status, retrieve logs, and launch applications.
sudo apt-get update
sudo apt install kubelet kubeadm kubectl -y
Ready to Initialize Kubernetes Cluster on master node
When you initialize a Kubernetes cluster using kubeadm init without specifying the --pod-network-cidr flag, the cluster's control plane components are set up, but inter-Pod networking will fail once you install a Container Network Interface (CNI) plugin.
sudo kubeadm init --pod-network-cidr=10.244.0.0/16You will then be required to run the highlighted commands as a regular user.
mkdir -p $HOME/.kube
sudo cp -i /etc/kubernetes/admin.conf $HOME/.kube/config
sudo chown $(id -u):$(id -g) $HOME/.kube/config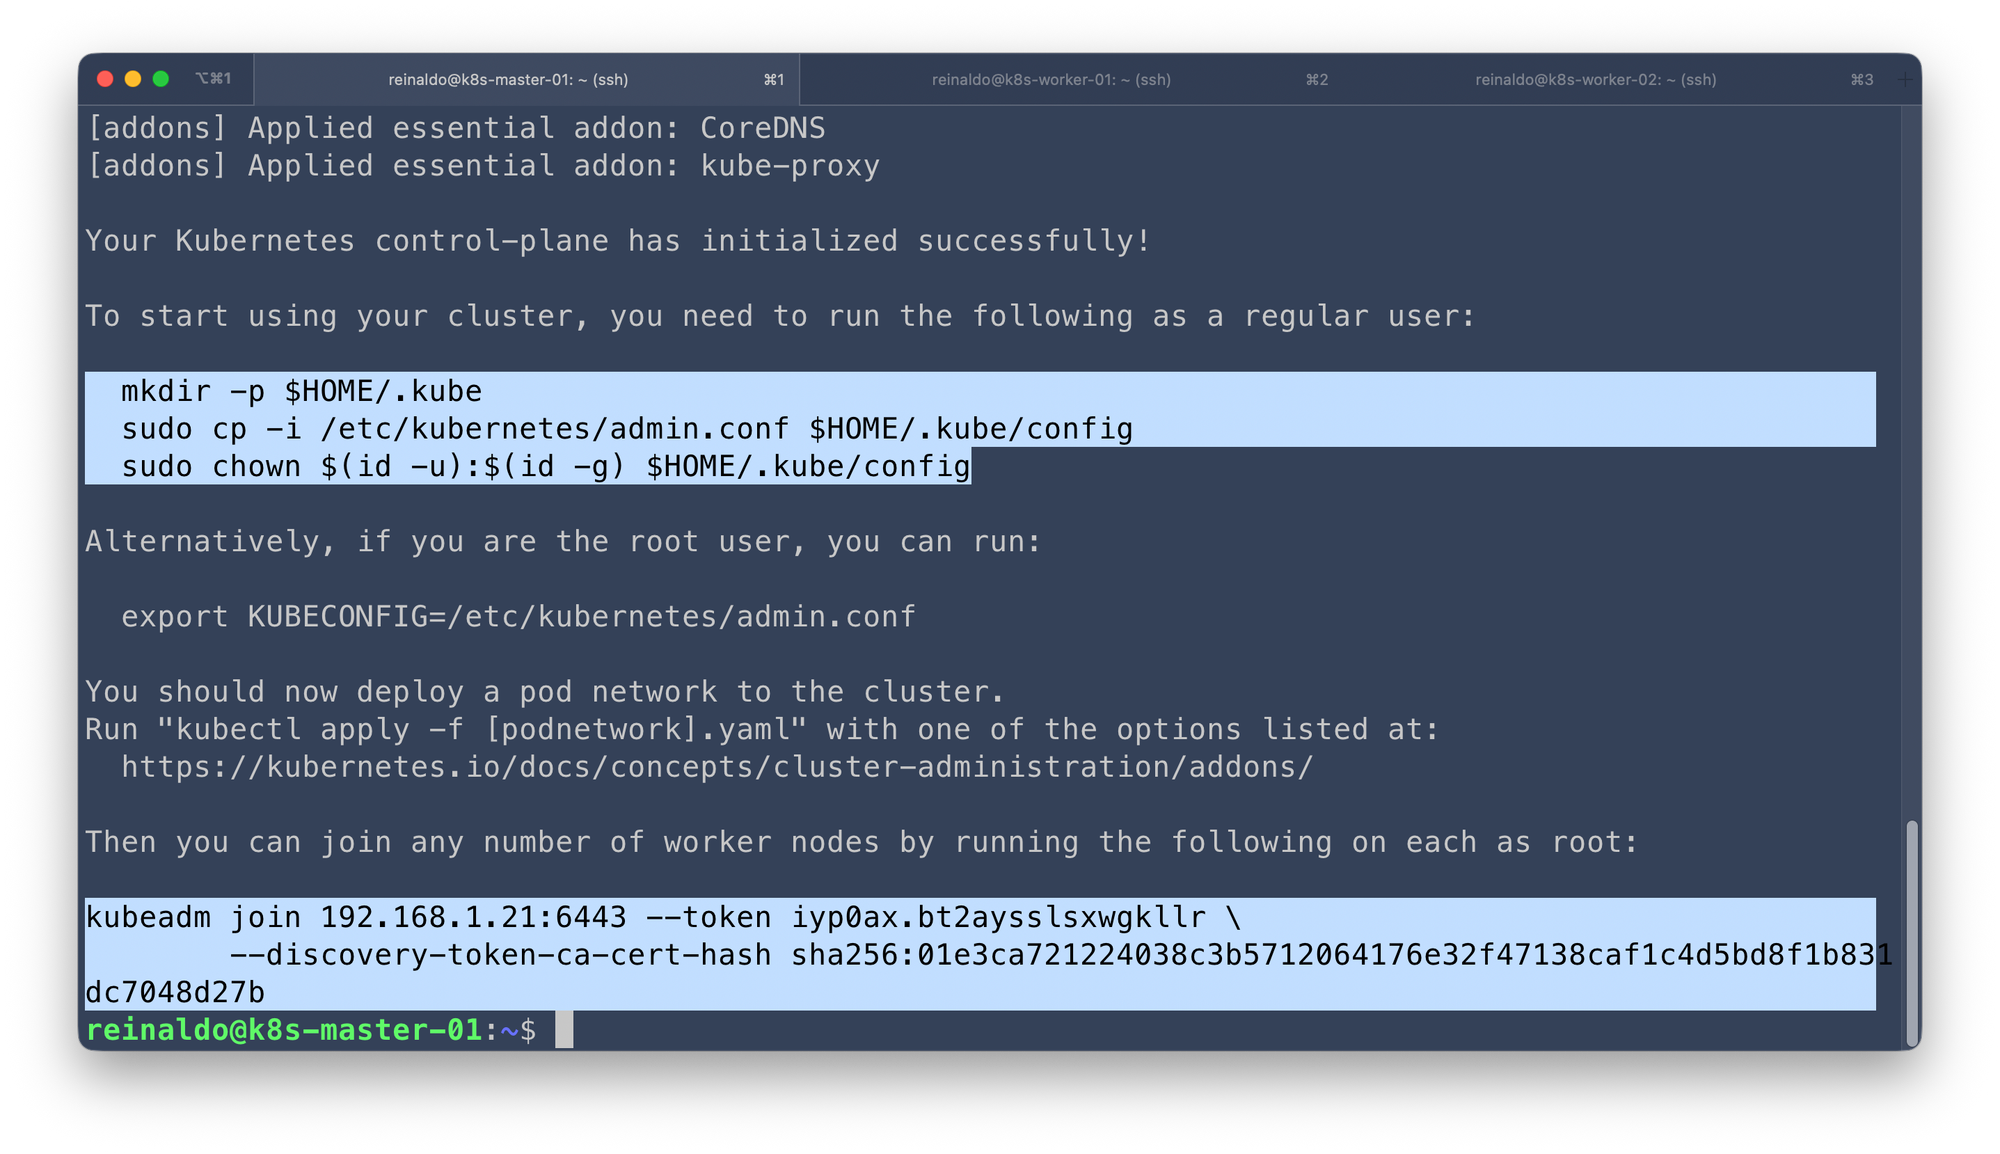
You've initialized your Kubernetes cluster but if you look closely, you’ll see that your Pods can’t talk to each other yet. It’s like having a beautiful new office building where none of the phones or ethernet cables have been installed.
Kubernetes needs a specialized tool to handle the actual wiring—this tool is called a Container Network Interface (CNI) plugin.
In this scenario I'll use Calico CNI plugin, here are the fews steps to install it:
kubectl create -f https://raw.githubusercontent.com/projectcalico/calico/v3.28.0/manifests/tigera-operator.yaml
Comments ()